How to Successfully Perform Injection Molding at Home?
Injection molding at home presents an exciting opportunity for DIY enthusiasts. It allows you to create complex shapes and custom parts in the comfort of your space. You don't need large factories or expensive equipment. A small setup can yield impressive results. However, challenges exist.
Understanding the materials and equipment is crucial. The process requires precision and care. Temperature control is vital, as overheating can ruin your projects. You may encounter trial and error. Your first attempts might not be perfect. Adjusting your technique and settings is part of the learning curve.
Safety is another important aspect. Using heat and machinery poses risks. Protective gear is essential. Inadequate safety measures can lead to accidents. Awareness and preparation can help prevent issues. As you embark on your journey with injection molding at home, embrace the learning process. Adaptation and resilience will lead to success.

Understanding Injection Molding: Basics and Equipment Needed
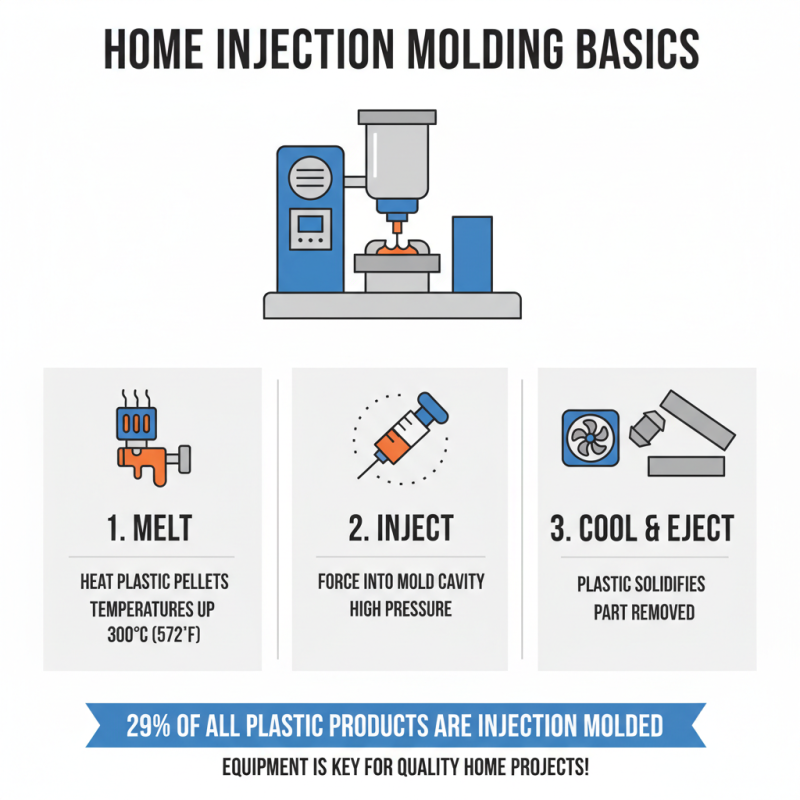
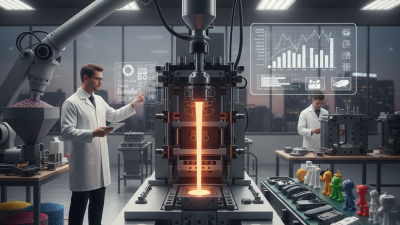
Understanding the basics of injection molding is crucial for successful home projects. Injection molding uses heat to melt plastic, which is then injected into a mold. According to industry reports, 29% of all plastic products are created using this method. The right equipment is necessary to achieve quality results.
A basic setup includes a plastic injection machine, molds, and cooling systems. Machines vary in size and complexity, often dictating the cost and usability. Most home users opt for smaller, electric tabletop machines. These can cost between $1,500 to $5,000. Molds can also be quite expensive. Basic single cavity molds may start at $200, while more complex designs can escalate to thousands.
Yet, many novice users underestimate how precision affects quality. Inadequate heating or cooling can lead to defects in finished products. Additionally, poor mold design often results in issues like warping or uneven thickness. Seeking feedback from online forums can help address common problems. The learning curve is steep, requiring trial and error to find a successful process.
Preparing Your Workspace for Safe and Efficient Molding
Setting up a suitable workspace is crucial for successful injection molding at home. A well-organized area leads to efficient production and safety. Ensure good ventilation; exposure to certain materials can be harmful. According to industry reports, approximately 35% of health issues in DIY molding arise from inadequate air circulation.
Create designated zones for materials, tools, and molds. Use heat-resistant surfaces to prevent damage. A clean environment minimizes contamination, which can compromise your final product. Over 28% of hobbyists report inconsistent results due to dirty molds or materials. Proper storage solutions can help maintain organization and cleanliness.
Safety should never be overlooked. Wear appropriate gear like gloves and goggles. In a survey, 45% of new molders experienced minor injuries due to neglecting safety. Reflect on past mistakes—poor planning can lead to project failure. Monitor temperatures carefully; overheating can ruin your molds and materials. Taking the time to prepare your workspace can enhance your molding experience significantly.
Selecting the Right Materials for Your Injection Molding Projects
Selecting the right materials is crucial for successful injection molding at home. Different projects require different plastics. Common materials include ABS, PLA, and polypropylene. Each has its unique properties and suitable applications. For example, ABS is impact-resistant, making it ideal for functional parts. PLA, on the other hand, is biodegradable and easier to mold but may not hold up under high temperatures.
Choosing the wrong material can lead to failures. Some plastics can warp when cooling or not adhere properly. Beginners often overlook these factors. Take the time to research material properties. Understand how they behave during the injection process. Consider safety and environmental impact too. Discussing with local makers or reading online forums can provide insights. Make small test pieces to evaluate your chosen material. This step is often underestimated but can save time.
How to Successfully Perform Injection Molding at Home? - Selecting the Right Materials for Your Injection Molding Projects
| Material Type |
Melt Temperature (°C) |
Recommended Use |
Pros |
Cons |
| PLA (Polylactic Acid) |
160 - 180 |
Toys, Food Containers |
Biodegradable, Easy to print |
Low heat resistance |
| ABS (Acrylonitrile Butadiene Styrene) |
210 - 250 |
Automotive parts, Electronics |
Strong, Good shock resistance |
Releases fumes when heated |
| PETG (Polyethylene Terephthalate Glycol) |
220 - 240 |
Bottles, Medical applications |
Durable, Food safe |
Tends to be stringy |
| Nylon |
240 - 260 |
Mechanical parts, Gears |
Flexible, Strong |
Hydrophilic, Requires drying |
| Polycarbonate |
270 - 300 |
Safety goggles, Electronics |
High impact resistance |
Difficult to print |
Step-by-Step Guide to the Injection Molding Process at Home
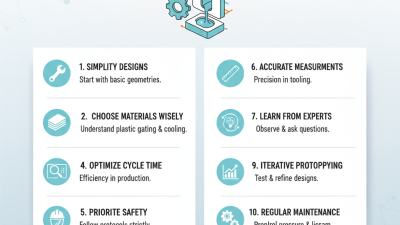
Injection molding at home can be an exciting endeavor. With the right tools and mindset, you can create various plastic parts. This process involves melting plastic pellets and injecting them into a mold. It’s not as straightforward as it seems. Many beginners struggle with the settings and temperature controls. Getting that perfect finish takes practice.
To start, set up a safe working area. Ensure you have ventilation. Safety gear is essential. Following the basic steps is crucial. Measure the plastic pellets accurately. Heat the machine while adjusting pressure settings. Watch the melt until it flows smoothly. Inject into the mold quickly. Timing is essential here; too slow can lead to imperfections.
After cooling, the results may surprise you, but not always in a good way. Mold lines or uneven textures can show up. It’s normal to encounter flaws. Don’t get discouraged. Analyze what went wrong. Maybe your mold design needs adjustments. Learn from each attempt. Over time, you’ll find the right techniques for cleaner results. Experimentation is key in mastering this craft.
Troubleshooting Common Issues in Home Injection Molding
Troubleshooting is key in home injection molding. One common issue is
inconsistent fill patterns. It often occurs due to improper temperature settings.
Check the melting temperature. Adjust it if necessary. You may need to experiment a bit.
Sometimes, the plastic doesn’t flow smoothly into the mold.
Air bubbles can also be problematic. They often form if the mold is not
vented properly. Ensure there are air release channels in your mold. This simple check can save a lot of headaches later.
Another issue is related to the cooling phase. If the item warps, cooling might be too slow or uneven. Consider using a fan to facilitate quicker cooling.
Sometimes, the finished product might stick to the mold. This can cause damage. To prevent this, ensure that you use a good
release agent. However, too much release agent can create a greasy finish.
A delicate balance is essential. Regularly inspect your molds for wear and tear.
Small imperfections can lead to larger problems.